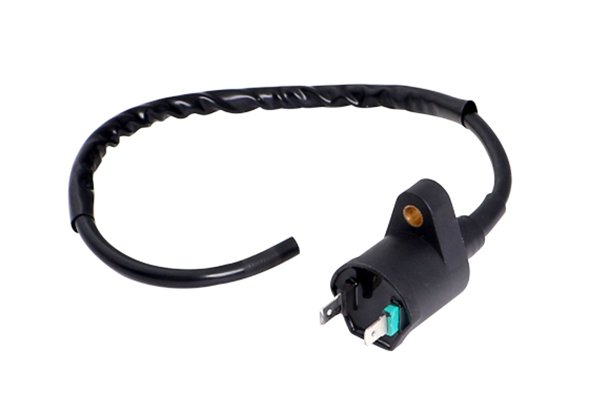
The ignition coil is responsible for supplying energy to the spark plugs in any vehicle’s ignition system. A vehicle’s ignition coil may need to be replaced if it won’t start, misses frequently, or stalls frequently. Moreover, many businesses nowadays consider the importance of an ignition coil supplier which must be a top priority since the quality must be taken first to avoid issues.
Fortunately, a quick and simple test can indicate whether the ignition coil is working properly and, as a result, whether a trip to the auto parts store or mechanic’s garage is necessary.
With this, one should always be mindful enough to test the automotive ignition coil. Read this blog to know more details.
Why We Should Do Ignition Coil Testing?
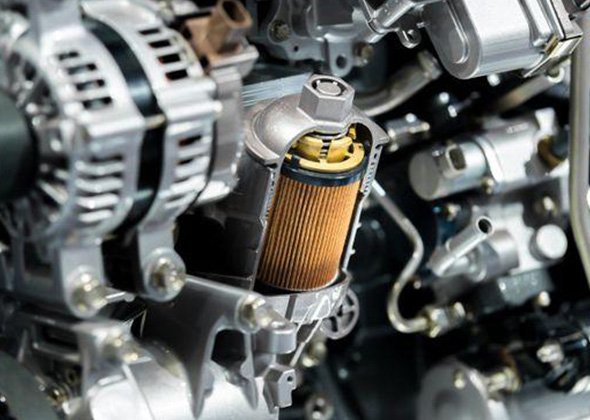
Ignition coils are an important component of the ignition system. They are responsible for converting the 12-volt power supply into a high voltage and high current output.
Ignition coils can fail in many ways, including overheating, sparking, and arcing. The most common failure is an open coil which means that there is no spark at all. When an ignition coil fails it must be replaced immediately to avoid damage to other components like the catalytic converter.
Here are some reasons why we should do ignition coil testing:
- Prevent engine damage – Ignition coils are responsible for producing a spark that ignites the fuel in our engines. If one or more of them fails then this process will not happen properly and could cause serious damage to the engine. By testing the ignition coils regularly, it will be able to catch any potential problems.
- Save money – Testing the vehicle’s ignition coils regularly can help save money by preventing future engine repairs and replacements that would otherwise have been necessary if left unchecked.
Common Ignition Coil Malfunction Signs
If one notices that a vehicle is not starting, has trouble starting, or stalls when it does start, it may have a problem with one or more of the ignition coils in the engine. The following are some common signs of an ignition coil malfunction:
Loss Power
When the ignition coil is not working properly, it can cause problems with a vehicle’s engine. The ignition coil is located in the distributor of the vehicle. It acts as a transformer for the power generated by the battery. The ignition coil is responsible for igniting the spark plugs in order to start the engine.
It uses high voltage from the battery to create a high-voltage spark that jumps across the gap between two electrodes inside an inductor. The spark jumps across this gap and ignites the fuel in the combustion chamber, causing combustion.
Check Engine Light Flashing
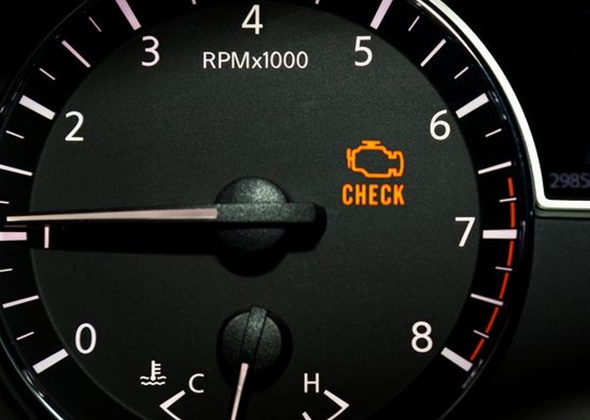
The Check Engine Light can be caused by any number of problems, including bad fuel injectors, faulty oxygen sensors, and bad catalytic converters. The most common cause of the Check Engine Light is an ignition coil failure. Ignition coils are responsible for sending electricity to the spark plugs in order to ignite the fuel being pumped into the engine. If one of these coils fails, it will not send enough current to ignite the spark plugs and the car will not run properly. For example, if one of the coils fails while driving at high speeds, the car may stall out because it cannot produce enough power to keep running efficiently.
Backfiring or Misfiring Engine
Backfiring can be caused by a number of reasons. The most common cause is a faulty ignition coil. When the spark plug fires, the coil creates an electrical signal that travels down the wire and to the spark plug. If there is any damage to the coil, it will not allow for a proper signal or current to be produced and will cause backfiring.
The most common reason for this is from an ignition coil that has become dirty or corroded over time. The buildup of dirt and other particles on these coils can interfere with their ability to produce a proper current flow through them. This causes backfiring when it misfires or does not work properly.
One way to avoid this problem is by changing the oil more often than normal and keeping a car maintained according to the manufacturer’s recommendations. Another way is to take the vehicle in for regular maintenance at least once a year so that our technicians can inspect its overall condition and make sure everything is working properly before anything goes wrong with the vehicle’s performance or safety systems.
Sounds of Coughing
A coughing sound is generally a sign of ignition coil failure. The ignition coil is responsible for providing the spark that ignites the fuel mixture in the car’s engine. When the coil fails, it can produce a loud noise as it tries to fire. This noise sounds like a cough, which is why it’s sometimes called a “coughing” problem. If the car has a coughing problem, check the coils first before replacing any other parts.
The location of the coils varies depending on the type of vehicle and its engine design. For example, some engines have coils inside their distributor caps while others have them mounted near each cylinder head or even under each spark plug wire.
In many cases, broken wires can cause coughing problems as well. The wires send electricity from the distributor cap to each spark plug wire and they should be inspected when troubleshooting this issue because they’re often damaged when they break off due to wear and tear or poor maintenance practices like not changing the oil regularly enough or having the wrong viscosity oil installed in the vehicle’s engine oil pan due to using an incorrect type of filter (for example).
The sudden movement of a coil
The sudden movement of a coil primary winding may cause damage by breaking off a coil lead or loosening the bond between the core and the wire.
The most common cause is improper installation. The coil can be damaged during shipping or handling. Another reason is that the ignition module has been removed and reinstalled incorrectly.
If the ignition coils are being replaced, make sure that all leads are properly secured in their terminal sockets. Also, make sure that all wires are connected properly to their appropriate terminals on the module or flywheel housing.
How To Test An Ignition Coil?
Ignition coils are responsible for converting the 12 volts of power from the vehicle’s electrical system into the 15,000 or more volts needed to jump the gap between the spark plug’s electrodes. If any of these coils are malfunctioning or have been damaged, it can cause poor performance and even failure of the ignition system.
Performing an Ignition Coil Spark Test
In performing an ignition coil spark test, there are several steps that need to be considered. Below are as follows:
1. Open the hood and turn off the car.
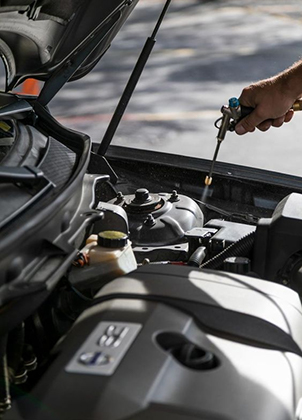
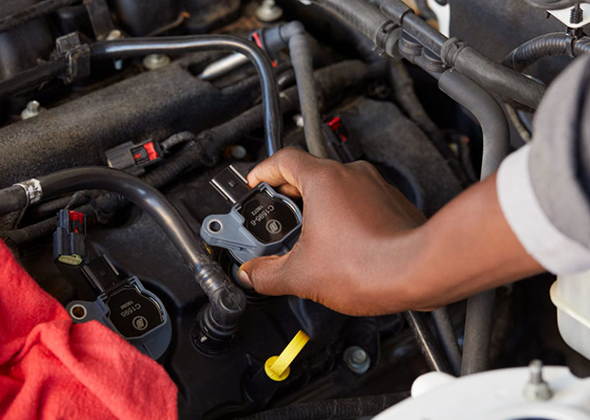
Start the test with the car in park and the engine turned off, like with most sorts of vehicle maintenance. To find the ignition coil, open the hood. Though its exact placement varies from vehicle to vehicle, it is usually found near the fender or fastened to a bracket near the distributor. The spark plugs will be linked directly to the coil in vehicles without a distributor.
- Locating the distributor and following the wire that does not connect to any spark plug is one sure-fire technique to discover the ignition coil.
- Then, use safety goggles or other eye protection, as well as insulated instruments (particularly pliers) to protect from electric shock.
2. Remove one of the spark plug wires from its corresponding plug.
Remove one of the spark plug’s wires from the plug itself next. These wires usually travel from the distributor cap to each spark plug separately. When working with the vehicle’s electrical system, use gloves, and insulated equipment at all times to prevent harm.
- The vehicle’s interior components are likely to be quite hot if it has been operating for a long time. After only 15 minutes of driving, a car’s engine may reach temperatures of over 200 degrees. To avoid serious harm, let the automobile sit and cool for an hour.
- Consider utilizing a spark plug tester instead to save time and prevent potentially harming the spark plug. Rather than reconnecting the spark plug to the wire, connect the spark plug tester to it. The clip should be grounded. Then asked a friend to crank the engine while looking for sparks in the gap in the tester.
3. Using a spark plug socket, remove the spark plug.
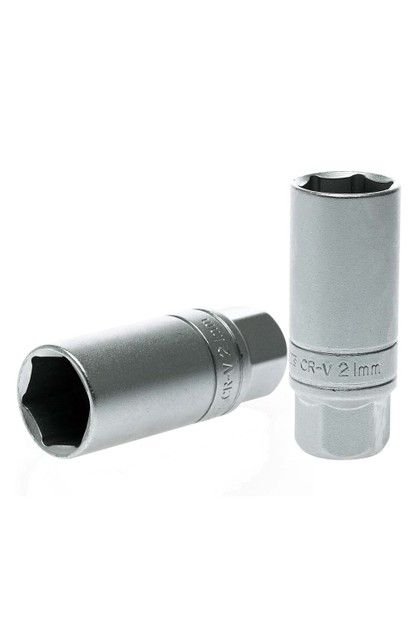
Remove the spark plug itself once removed the spark plug wire. The best way to do this is using a spark plug socket, which is a specialized socket wrench.
- From now on, take care not to let anything fall into the empty hole where the spark plug used to be. Leaving debris in this hole can cause harm to the engine while the vehicle runs, and because removing anything from this hole can be a major nuisance, it’s better to take precautions to avoid this.
- To keep debris out of the combustion chamber, cover the cavity with a clean cloth or towel.
4. Reconnect the spark plug wire to the spark plug.
Reconnect the spark plug to its wire with care. To avoid electric shock, handle the spark plug using insulated pliers that are linked to the distributor but not inserted in its “hole.”
5. Touch any exposed metal in the engine with the threaded part of the spark plug.

Next, position the spark plug (with the wire still attached) such that the threaded “head” of the plug is in contact with a metal component of the engine. This might be any solid metal portion of the engine block, including the engine itself.
- Hold the spark plug with insulated pliers once more (and, if possible, gloves). Don’t risk electric shock in the next stages by skipping this easy precaution.
6. The gasoline pump relay or fuse should be removed.
Disconnect the fuel pump before cranking the engine to test the spark plug. The engine will not start after this, enabling the driver to test the coil for spark.
- Because there is no spark plug in the cylinder being tested if the fuel pump relay is not removed, the cylinder will not fire. However, it will still be saturated with fuel, posing a major threat.
- Locate the fuel pump relay in the handbook.
7. Allow a friend to start the engine.
Turn the key in the ignition with the help of a buddy or assistance. This will supply electricity to the vehicle’s electrical system, as well as the spark plug on the holding (assuming the ignition coil is working)
8. Blue sparks should be sought.
When the engine starts, one should see a brilliant blue spark leap across the spark plug gap if the ignition coil is operating properly. In the daylight, this spark will be apparent. If there’s no blue spark, the ignition coil is most likely bad and has to be replaced.
- Orange sparks indicate a problem. This indicates that the ignition coil is not providing enough energy to the spark plug (this can be for any number of reasons, including cracked coil casings, “weak” current, faulty connections, etc.).
- The last thing one could notice is that there is no spark. This is frequently an indication that the ignition coil is fully “dead,” that one or more electrical connections are broken, or that one should perform the test incorrectly.
9. Replace the spark plug and reconnect its wire with care.
When finishing the test, make sure the car is switched off before going through the preparation stages again in reverse order. Remove the spark plug from its wire and reinstall it in its hole, then reconnect the wire.
Congratulations! The ignition coil test is complete!
Performing an Ignition Coil Resistance Test (“Bench Test”)
1. The ignition coil should be removed from the vehicle.
The test described above isn’t the only technique to see if the vehicle’s ignition coil is working properly. If one has access to an ohmmeter, a piece of electrical equipment that measures electrical resistance, it may assess the efficacy of the ignition coil in a more objective, quantitative manner than the one described above. To begin this test, remove the ignition coil from the car so that it can readily reach the electrical connections.
- Remove the ignition coil according to the directions in the repair manual. It’s usually necessary to separate it from the distributor wire before unscrewing it from its mounting with a wrench. Before starting, make sure that the car is switched off and has had time to cool.
2. Find the ignition coil’s resistance parameters.
In terms of electrical resistance within the coil, each vehicle’s ignition coil has its own set of parameters. If the actual resistance values of the coil go outside of these parameters, the coil is destroyed. In most cases, reviewing the service handbook will provide the resistance parameters particular to the car. If one can’t find it here, try contacting the dealership or searching online for vehicle information.
- Most automobile coils have resistance readings of 7 – 1.7 ohms for the primary winding and 7,500 – 10,500 ohms for the secondary winding.
3. Place the ohmmeter’s leads on the poles of the main coil.
There will be three electrical connections on the distributor: two on each side and one in the center. It makes no difference whether these are exterior (jutting out) or internal (sunk in). Connect one lead to each of the exterior electrical connections using the ohmmeter. The resistance measurement represents the principal winding resistance of the coil.
- Some contemporary ignition coil types include contact arrangements that are different from the typical design. If not sure which contacts belong to the primary winding, see the vehicle’s handbook.
4. Place the ohmmeter’s leads on the poles of the secondary coil.
Keep one lead on one of the outside connections and the other on the ignition coil’s central, inner contact (where the main wire to the distributor connects). The resistance measurement represents the resistance of the secondary winding of the coil.
5. Check to see if the readings are within the parameters of the car.
Ignition coils are sensitive electrical components of a car. One should replace the ignition coil if either the main or secondary windings are even slightly outside of the vehicle’s standards since an existing one is likely damaged or faulty.
Swapping Coils
A bad ignition coil can cause a variety of symptoms, including a misfire, rough idle, and engine light on. Replacing an ignition coil is an easy task that can be done by anyone.
- Disconnect the negative battery cable from the battery with a wrench.
- Remove the coil wire from its plug on the distributor cap. Remove the boot from around each coil and set it aside with the wires attached to it.
- Remove the retaining bolts from each coil, then use a socket wrench to remove them from their mountings in the engine bay. Pull out each old coil and discard it carefully to avoid damaging other components in the engine compartment.
Test The Windings With A Multimeter
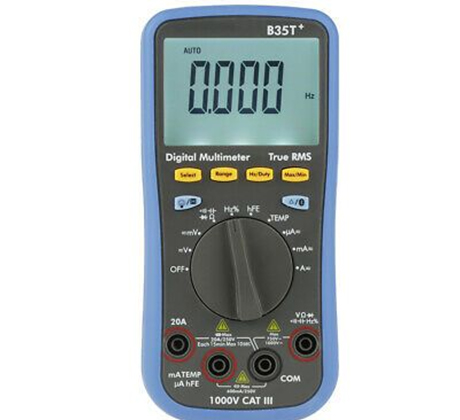
A multimeter is a useful tool for testing the windings on an ignition coil. The meter will tell if each winding has continuity and whether there are any shorts or open circuits in the coil.
To test the windings with a multimeter, follow these steps:
1. Set up the vehicle
Switch on the emergency brake once the car has cooled down after any driving or idling. Disconnect the negative battery cable from the battery end connector by opening the hood.
2. Remove the ignition coils.
Look for the coil pack near or on the engine. Remove the ignition coils from the engine area by disconnecting the mounting nuts that stabilize them.
3. Examine the primary winding.
The primary winding is composed of thick wire and receives energy directly from the battery. Connect the multimeter’s positive and negative leads to the appropriate terminals on the ignition coil. Positive and negative leads are represented by symbols such as a plus and minus sign on each terminal. For further information, consult the owner’s handbook. Take note of the multimeter reading and compare it to the resistance required for the primary winding. If the reading falls outside of the typical range, the resistance coil must be replaced. If the measurement is zero, the coil may have internally shorted out. However, if the reading is really high, the coil is open. If the reading is open, the coil is in good operating order.
4. Check secondary winding.
It wraps around the coil several times and receives energy from the primary, which is then passed to the spark plugs. It is thinner than the primary winding. Connect the positive terminal and center pole of the multimeter with the right multimeter leads. If the reading falls beyond the recommended range for maximum performance, the ignition coil must be replaced.
5. Resolve each problem.
Are there several ignition coils in the vehicle? If affirmative, remove and test each one independently, taking notes with a multimeter on the results, and then reinstall or replace each one as needed.
6. Remember to inspect the spark plugs.
Because defective spark plugs cause ignition coil failure, one should check the condition of the spark plugs as well. Bad spark plugs might overwork and overload the ignition coils. The coils will most likely fail again if the spark plug problem is not resolved.
Spark Test Or Active Analysis
The spark test is a simple and quick way to verify the operation of an ignition coil. The test consists of applying a voltage between the primary and secondary windings of the coil while monitoring the current flow through it.
The spark test is used in conjunction with other tests to isolate an ignition coil failure. The most common cause of coil failure is a broken wire or damaged connection in the primary wiring harness or distributor cap.
To perform the spark test:
- First, connect one end of the spark tester to the negative terminal on the battery, and connect the other end to one side of the ignition coil.
- Second, attach another wire from that side to the ground (this should be somewhere on the engine block near where one is working).
- Third, link the third lead from the negative terminal on the battery to one side of the ignition coil primary winding, then connect another wire from that side to the ground (again, this should be somewhere on the engine block near where it is working).
- Finally, connect the third wire from that side of the ignition coil’s primary winding to either terminal on the battery’s positive post (not negative).
Simple Tips
- Aftermarket ignition coils are made to varying specs and tolerances, which might impact the ignition system’s performance. Choose high-quality replacement components wherever possible.
- If there are any sparks, use a voltage/ohm meter to examine the output. Between 0.7 and 1.7 ohms should be produced by the main coil.
Basic Things to include:
- Wrenches (including spark plug socket)
- Screwdriver
- Insulated pliers
- Spark plug
- Wire
- Ignition key
- Ohmmeter or multimeter with resistance function (for resistance test)
Conclusion
More people are getting interested in automotive technology and testing automotive ignition coils is one of the best ways to identify problems with the ignition system. A well-functioning ignition coil will help the car start easily and without hassle, whereas a faulty one can damage the complete electrical system of the vehicle, especially if one will neglect it for too long.
That being said, there are certain simple steps one can take to gauge its functionality correctly and determine whether it’s faulty or not.
Additionally, Sunway Autoparts is committed to supplying its customers with a wide variety of aftermarket parts needs, particularly for antique vehicles and motorcycles. Is this blog helpful? Do not hesitate to contact them now.
Recent Blog
- The Best-Looking Porsche of All Time: What Makes Each One Beautiful
- Porsche Car Parts Price List: What You'll Actually Pay (Dealer vs. Aftermarket vs. Factory-Direct)
- Porsche Cayman vs 911 — Performance, Price, and the $40,000 Question
- Porsche Maintenance: The Complete Cost, Schedule, and Parts Guide for Every Generation