
The Golden Era Design Shift: 1955 vs 1956 Chevy Tail Lights
The Tri-Five era represents the absolute peak of American automotive optimism. While to the untrained eye, the rear profiles of the ’55 and ’56 Bel Airs, 210s, or 150s might blur together, seasoned builders know that 1955 and 1956 are worlds apart in engineering. The 1955 design is a masterclass in restrained, flush-mounted elegance. Fast forward just one year, and the 1956 model hurtles toward the space age with aggressive, protruding lines and hidden mechanical secrets that completely altered the rear sheet metal.
| Specification | 1955 Chevy Tail Light | 1956 Chevy Tail Light |
|---|---|---|
| Lens Shape | Flat, integrated standard profile | Protruding “Bullet” type housing |
| Bezel Feature | Smooth, minimal chrome rim | Heavy chrome with center Bowtie emblem |
| Fuel Filler Location | Exposed door on the left quarter panel | Hidden behind the driver-side tail light |
| Original Bulb | 1157 Incandescent | 1157 Incandescent |
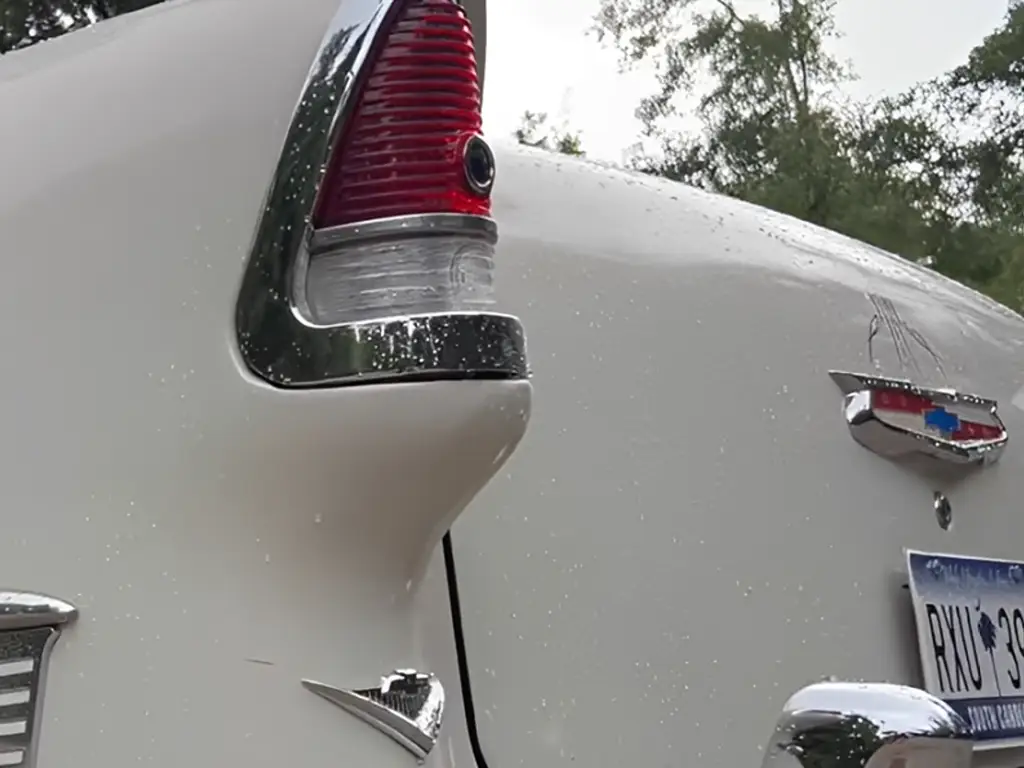
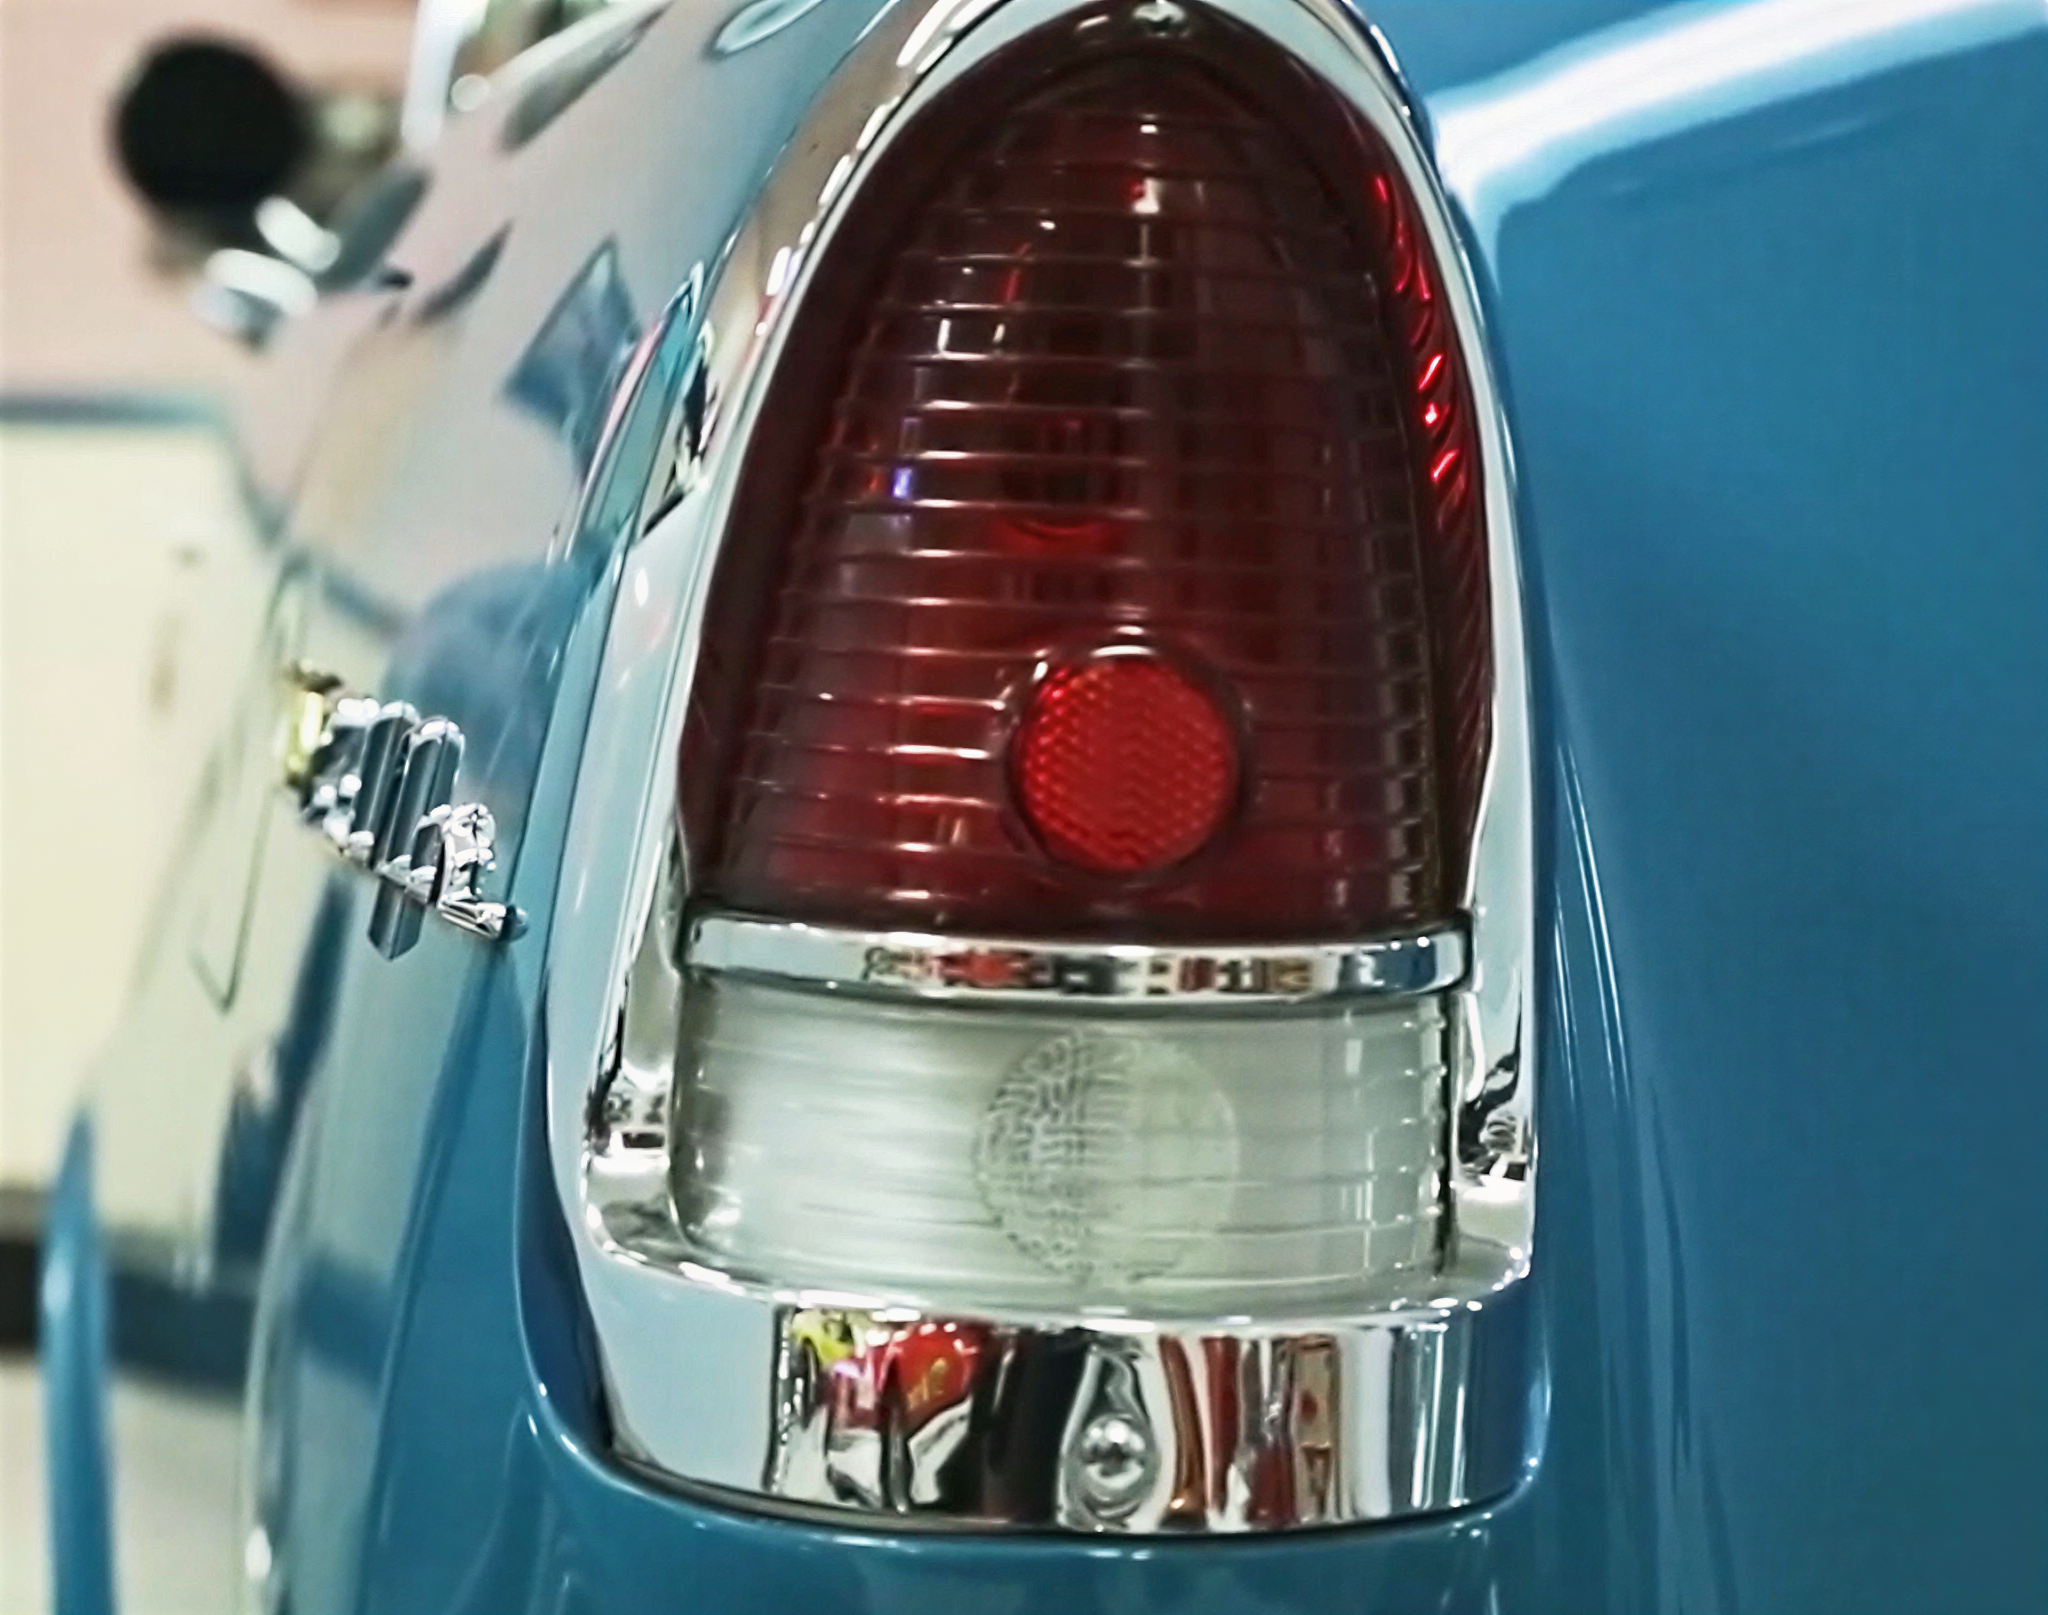 1955 Chevy: Flush-mounted elegance
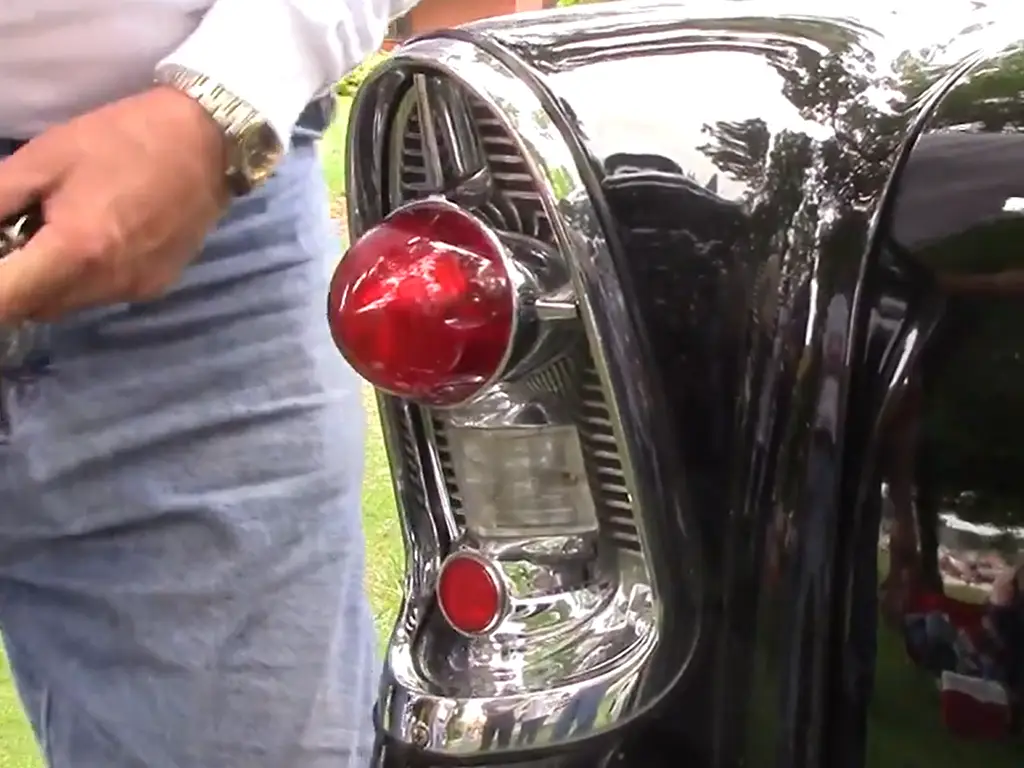
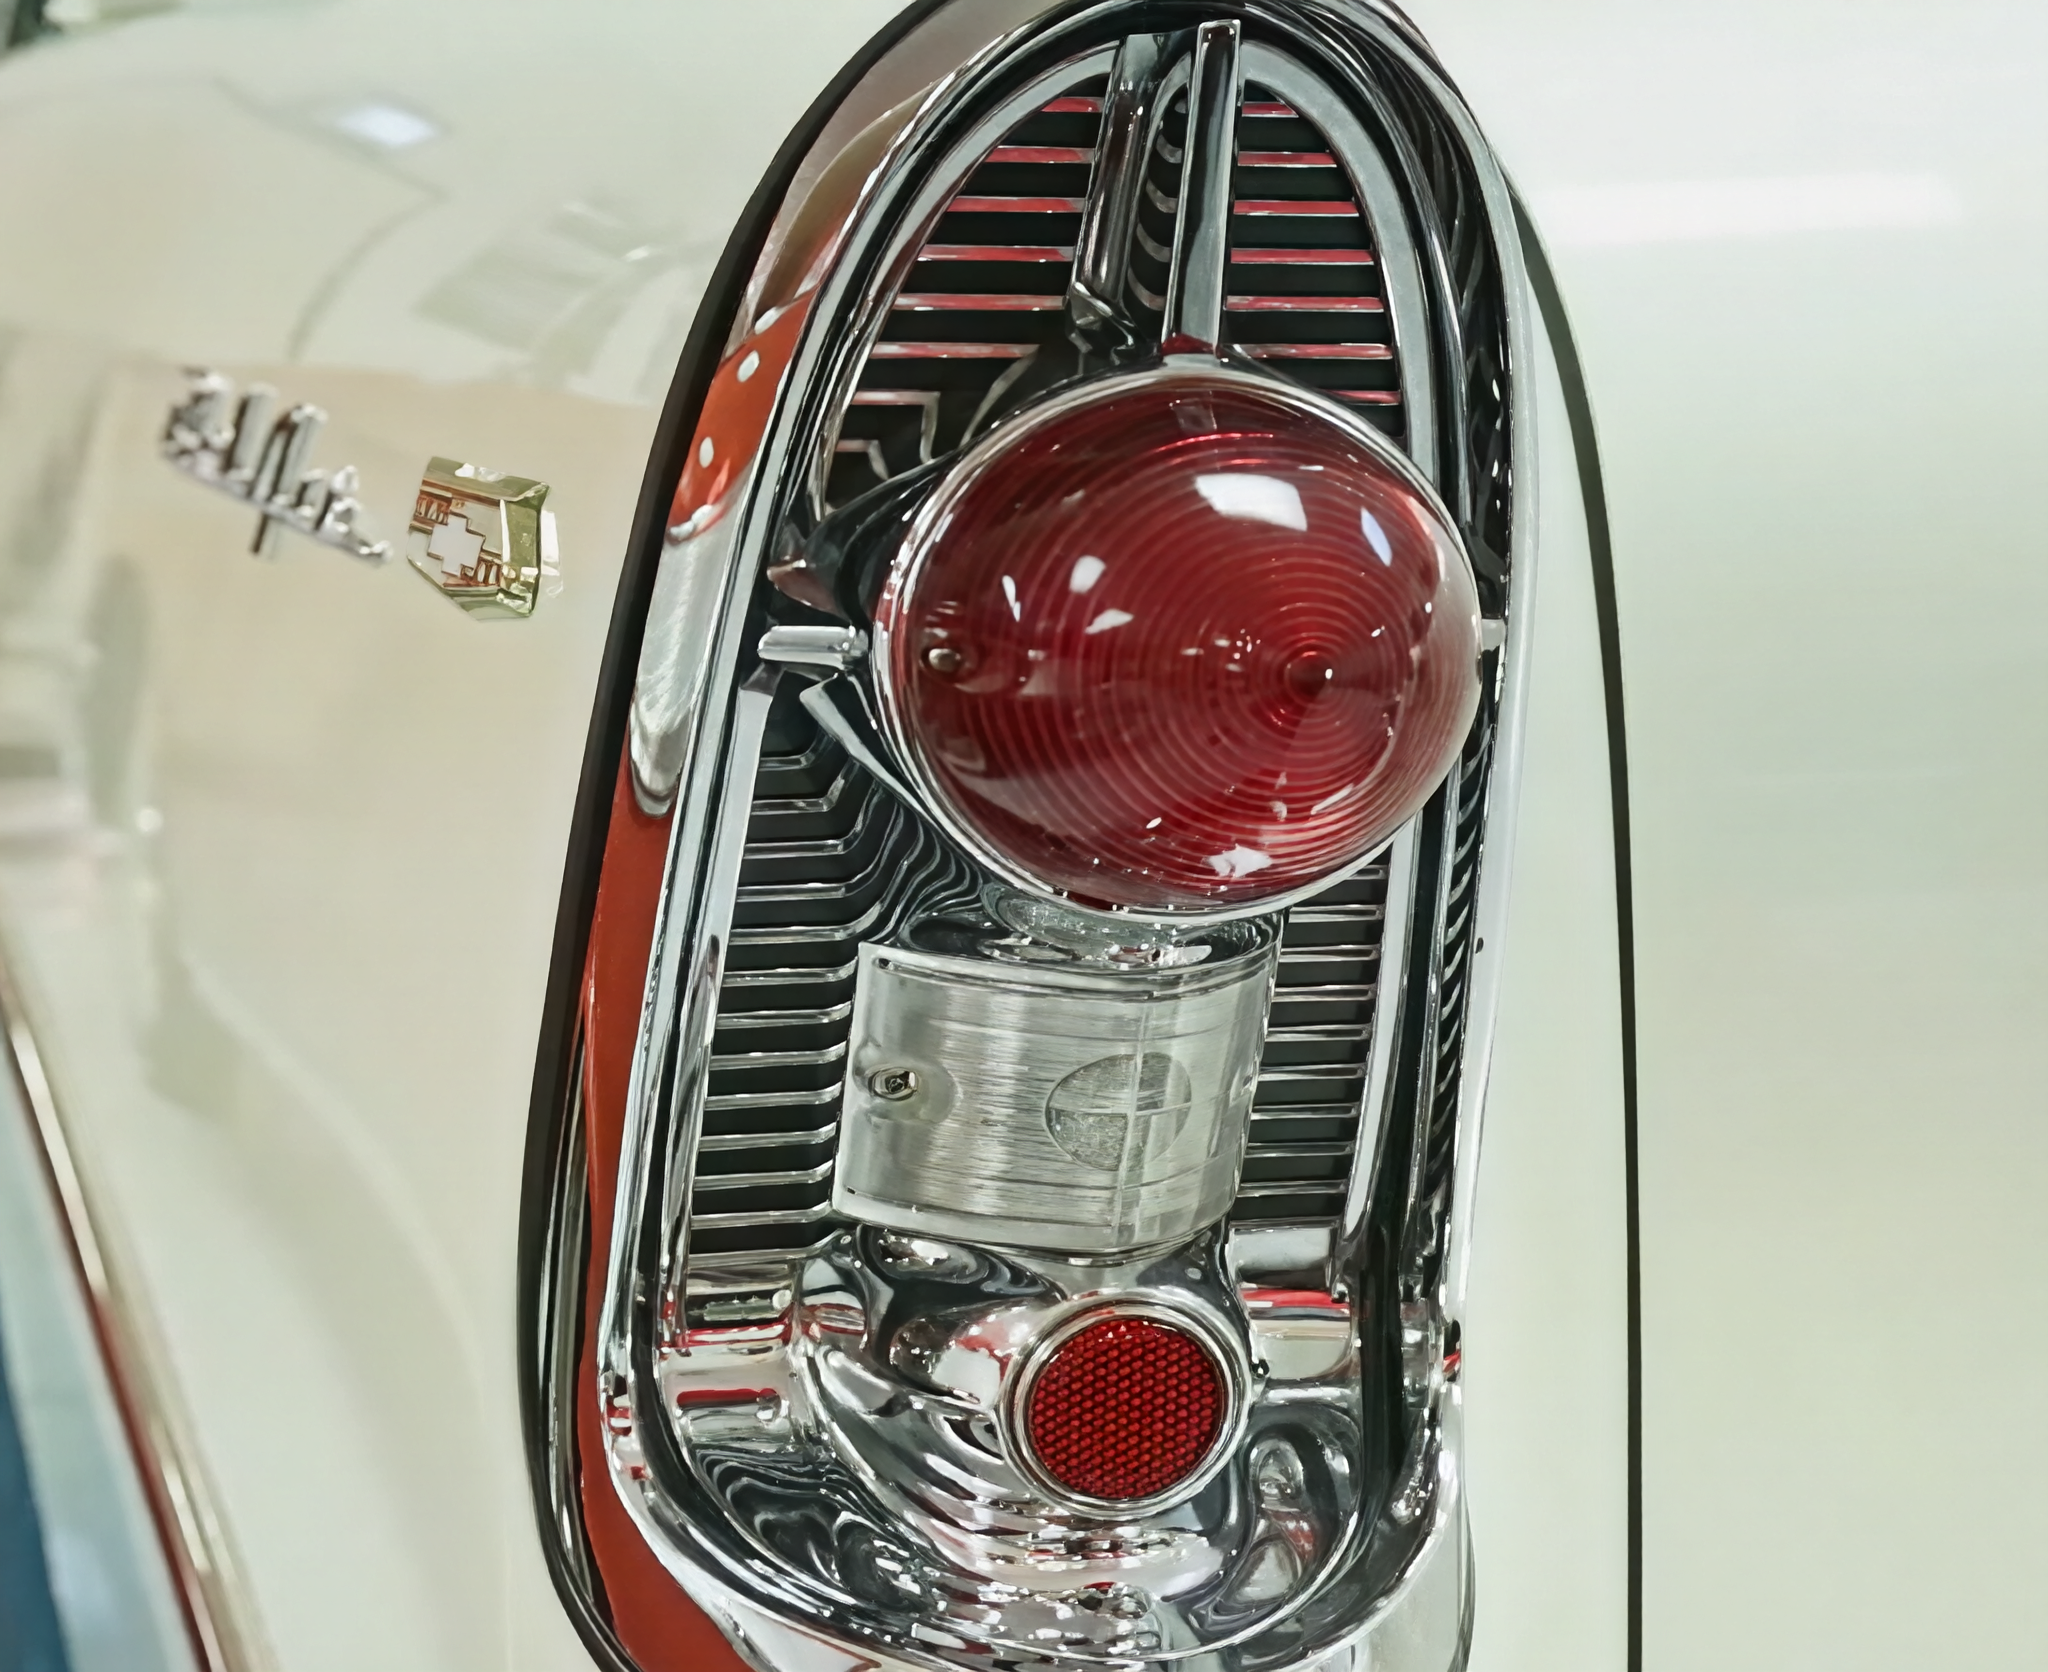 1956 Chevy: Aggressive bullet housing
Visual Spotter’s Guide: Flat Profile vs. The Bullet Housing
Identifying these classics at a swap meet or salvage yard requires a quick “three-second rule.” Look at the rear quarter profile from a side angle. The 1955 assembly sits nearly flush with the fender, cleanly integrating the backup lamp into a relatively flat plane. In contrast, the 1956 assembly abruptly breaks the bodyline. It features a massive die-cast chrome bezel that extends rearward like a jet engine nacelle, crowned by a distinct gold or silver Bowtie insert right in the center of the lens.
Shop Floor Solution: Verifying Mystery Fenders
The Trap: Buying second-hand quarter panels or tail lights with unknown histories.
The Fix: Measure the tail light mounting flange on the fender. The 1955 mounting surface is relatively flat and vertical. The 1956 sheet metal features a drastically deeper recess and altered screw hole geometry to accommodate the bullet housing and the hidden fuel hinge. Forcing a mismatch will leave you with a massive gap requiring extensive cutting and welding.
The Hidden Engineering: Fuel Filler Relocation Mechanics
The radical visual shift between the two model years wasn’t just aesthetic; it was driven entirely by mechanical necessity and GM’s relentless pursuit of uninterrupted body lines.
The 1955 Quarter Panel Fuel Door
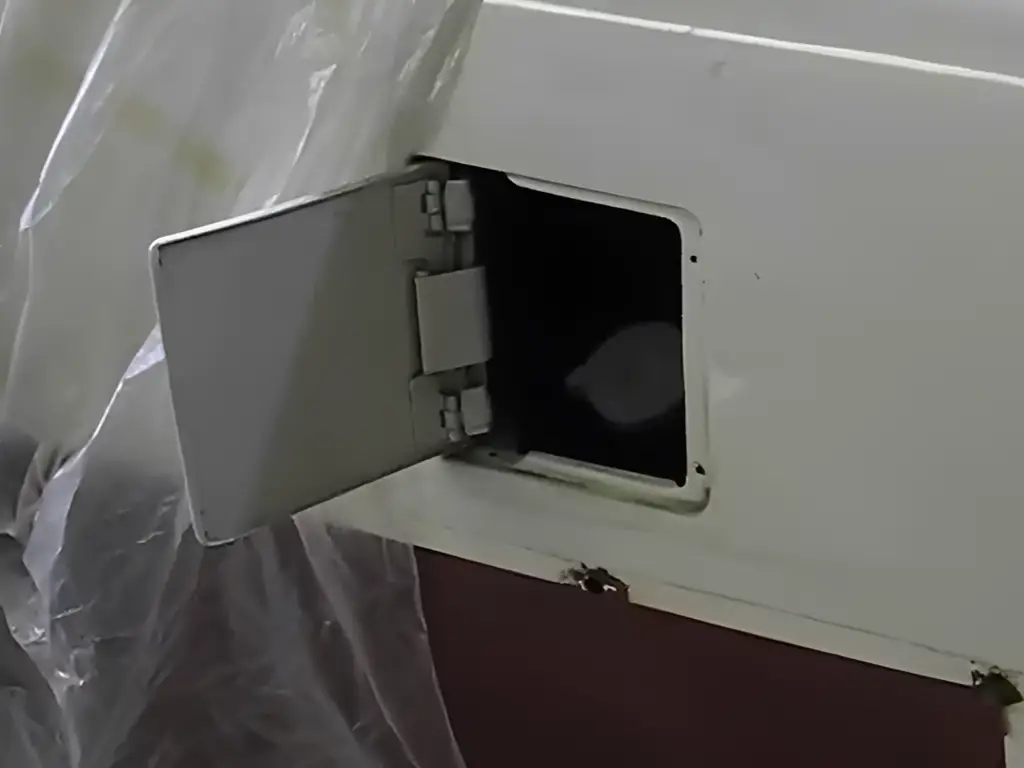
1955 utilized a highly traditional and reliable approach. The fuel filler neck was accessed via a visible, hinged door cut directly into the driver-side quarter panel. Consequently, the 1955 tail light assembly is a fixed, static, and fully sealed unit. From a wiring and restoration standpoint, this is the most straightforward system, completely free from moving parts or mechanical wear.
The 1956 Flip-Down Tail Light Secret
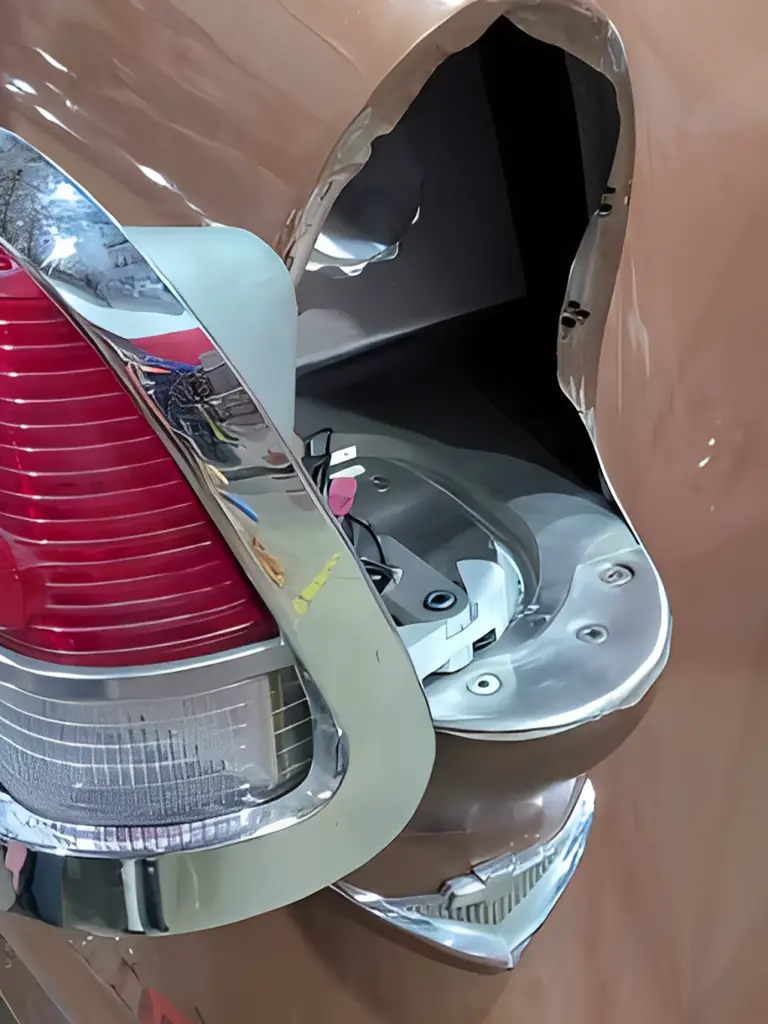
In 1956, GM designers executed a brilliant sleight of hand. They eliminated the visible quarter panel door and hid the fuel filler neck entirely behind the driver-side tail light. Depressing the top chrome trim allows the entire tail light housing to flip downward via a specialized spring-loaded hinge assembly.
Solving the “Sagging Tail Light” Syndrome
The Trap: 1956 owners often complain about the left tail light sagging, failing to close fully, or scraping the quarter panel paint at the gas station.
The Fix: You rarely need a full housing replacement. The 70-year-old flip-down springs have simply lost their tension. Source high-tension reproduction hinge springs. Crucially, when installing the new bezel, apply a micro-thin strip of Teflon tape inside the hinge clearance gap to protect your expensive clear coat from repetitive friction.
The Retrofit Dilemma: Are 1955 and 1956 Tail Lights Interchangeable?
A common pitfall for entry-level enthusiasts is assuming that Tri-Five parts are universally “plug-and-play” across the years. Attempting to swap a ’56 tail light onto a ’55 body for a quick facelift is a frustrating engineering dead-end.
Sheet Metal and Fender Contour Mismatches
Because the 1956 tail light houses a heavy chrome base and that complex mechanical hinge, the fender opening is substantially wider and recessed. If you attempt to bolt a 1956 assembly onto a 1955 quarter panel, you will be met with a severe perimeter gap. No rubber gasket in the world will seal that half-inch void, leaving your trunk completely exposed to water intrusion and rust.
The Double Fuel Door Paradox
Beyond sheet metal curvature, interchanging these years creates a logical impossibility regarding fuel delivery. If you successfully graft a ’56 driver-side tail light (which contains a hidden fuel door) onto a ’55 Chevy, you now have two fuel doors—one on the fender, and one in the tail light—with filler necks that align to absolutely nothing.
Resto-Mod Execution Standard
If a client absolutely demands a 1956 rear aesthetic on a 1955 chassis, the only professional execution is to entirely cut out the factory 1955 quarter panel fuel door, weld in a custom steel patch panel, grind it flush, and completely re-route a custom fuel filler neck to align behind the new 1956 tail light hinge.
Lens Optics and Aesthetics: Standard Red vs. Classic Blue Dot
When restoring the lighting, the lens material and optic style dictate whether the vehicle leans toward concourse authenticity or custom street rod culture.
Authenticity of the Guide Script Red Lens
For purists, standard red lenses feature a precise optical diffusion pattern designed to maximize the output of a standard tungsten bulb. Premium restorations demand UV-resistant polycarbonate lenses—avoiding cheap acrylics that yellow, craze, and crack within a year of sun exposure. A true factory-correct lens will also feature the original GM “Guide” script embossed directly into the plastic.
The Lavender Glow of Blue Dot Upgrades
Born from 1950s Hot Rod culture, the “Blue Dot” modification involves a small blue glass or jewel embedded in the center of the red lens. Optically, when the incandescent brake light illuminates, the red and blue light frequencies mix, casting a distinctive, nostalgic lavender/purple glow. It is the ultimate period-correct custom touch, though builders should always verify local DOT compliance before hitting the highway.
Modernizing the Glow: The Complete Guide to LED Tail Light Upgrades
Transitioning from 1950s electrical systems to modern solid-state lighting is the most common upgrade for Tri-Five owners, but the “plug-and-play” marketing often glosses over harsh garage realities.
The “Why”: Balancing Modern Safety with Classic Aesthetics
Driving a classic car in modern, distracted traffic with original 1157 tungsten bulbs is a massive liability. LEDs illuminate in microseconds—translating to roughly 18 extra feet of stopping distance for the driver behind you at 60 mph.
The Aesthetic Solution: Owners fear LEDs will look overly modern. To preserve the classic look, always purchase RED LED diode panels and pair them with RED original-style lenses. Placing white LEDs behind a red lens washes out the color, creating a cheap, pinkish hue. A premium red panel behind a Guide lens looks 100% factory when parked, but commands absolute attention when braking.
Solving the Hyper-Flash and Circuit Compatibility Trap
The most immediate disaster after an LED swap is a turn signal that blinks frantically or stays solidly lit. The original bi-metal thermal flasher relies on the high electrical resistance (heat) of a tungsten bulb to break the circuit. Because solid-state LEDs draw a fraction of an amp, the thermal flasher never heats up.
The Fix: Never splice high-heat cement load resistors into 70-year-old wiring harnesses—it is a severe fire hazard. Simply unplug the factory relay and install a polarity-free Electronic LED Flasher (such as #90652) designed specifically for low-draw loads. This safely solves hyper-flashing at the source.
Overcoming Clearance Issues and Terminal Splice Requirements
The internal cavity of a 1955 or 1956 tail light housing is incredibly shallow. Premium LED boards are often fully sealed in thick epoxy to prevent moisture corrosion, pushing the board dangerously close to the factory bulb socket.
The Fix: Forcing the lens screws tight against an obstructing socket will stress-fracture the LED circuit board. Do not use bulky residential wire nuts. Cut out the obsolete, oversized factory socket entirely and use slim quick-splice terminals or marine-grade heat-shrink butt connectors. This buys you crucial clearance inside the housing and creates an airtight, corrosion-proof electrical bond.
Restoration Pitfalls: Die-Cast Bezels and Grounding Faults
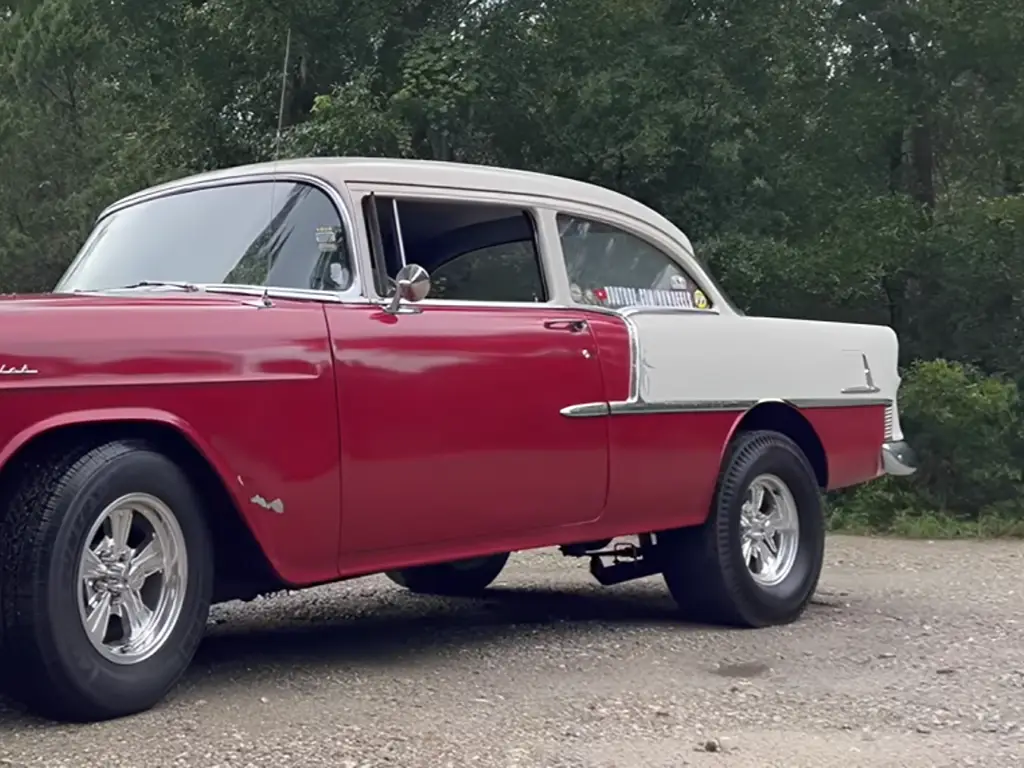
You’ve purchased pristine, brand-new tail light assemblies, carefully wired the vehicle, turned the headlight switch, and nothing happens. The culprit is almost always grounding.
Unlike modern vehicles with dedicated negative ground wires, 1950s automotive electrical systems rely heavily on Chassis Ground—the physical metal-to-metal contact between the tail light housing and the vehicle’s sheet metal.
The Fix: Brand new, premium die-cast bezels are heavily sprayed with a protective clear coat or powder coat at the factory to prevent shelf-rust. This coating acts as a perfect electrical insulator, frequently coating the inside of the mounting stud threads. Before installing a new bezel, run a small tap or a precision round file through the mounting threads to scrape away the clear coat until you see bare zinc or brass. One minute of filing will save you three days of chasing phantom electrical gremlins with a multimeter.
Choosing the Right 55/56 Chevy Tail Lights: From Restoration Projects to Professional Sourcing
Understanding the mechanical differences is only half the battle; procuring components that actually fit the factory sheet metal is what separates a flawless restoration from a frustrating, budget-draining ordeal.
For Individual Owners: Ensuring First-Time Fitment
For the DIY enthusiast in the home garage, the biggest trap is attempting to piece together new lenses or bezels onto 70-year-old, warped factory housings. To avoid 80% of fitment and grounding issues, the optimal route is to purchase Complete Tail Light Assemblies that come pre-wired with new sockets. Furthermore, meticulously check the product page—if a supplier lists a part as “1955-1956 Universal Fit,” walk away immediately. As we’ve established, a universal fit will not accommodate the ’56 left-side fuel door.
For Restoration Shops & B2B Buyers: The Engineering Edge in Sourcing
For professional restoration shops, a poor-fitting aftermarket part isn’t just an annoyance; it’s a direct hit to shop profitability. When a technician spends three unbillable hours grinding, shimmying, and modifying a cheap bezel just to make it sit flush against a quarter panel, the bay is tied up, and labor margins evaporate.
Avoiding this disaster requires partnering with a supplier who possesses a profound understanding of Classic Car culture and brand heritage. Exceptional manufacturers, like Sunway Auto Parts, understand that the difference between a 1955 and 1956 Chevy isn’t just a part number—it represents an entire shift in automotive sheet metal engineering. This deep respect for the original 1950s design philosophy acts as a massive barrier against the corner-cutting seen in generic, one-size-fits-all injection molding factories that have never actually touched a classic car.
It is this brand comprehension that drives manufacturing superiority. Instead of reverse-engineering flawed aftermarket copies, Sunway utilizes advanced 3D Reverse Engineering on highly sought-after, original NOS (New Old Stock) components. By scanning pristine vintage parts, they accurately capture the original 1950s metal shrinkage rates and tolerances. Operating strictly to OE Specifications ensures the ’56 spring hinge provides the exact tactile resistance of a factory original, and the ’55 die-cast flanges mount perfectly flush. For procurement managers and shop owners, choosing an engineering-driven supplier means eliminating fitment anxiety, protecting billable shop hours, and delivering concourse-level results every single time.




 English
  Spanish
  French
  German